2023/4/5

3M Bird of Time electrical conversion

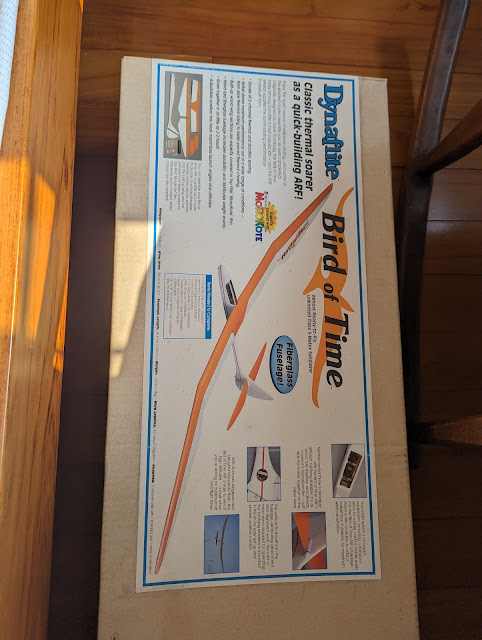
網路上碰到有出清收藏, 這是3M 無動力的版本. 2K NTD...

就算主義是三節式的收在盒子裡, 箱子還是非常長....差點沒地方藏....


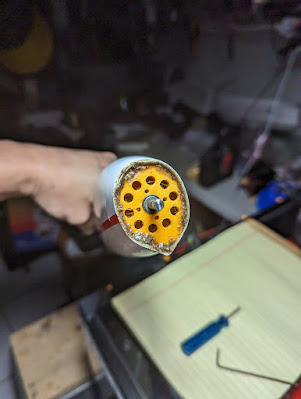
根據我的折獎的尺寸切開了機頭, 裡面這塊250G的鐵塊可是用expoxy 黏死在機身上,用熱風槍加熱好久讓膠軟化...才用鐵鎚敲下來...


後來改滑翔機的馬達都使用Kv1000以內的外轉馬達, 因為馬達出線的關係, 我比較喜歡倒裝外轉馬達, 這樣出線就不會卡到機身...
以往這樣倒裝馬達的下偏角很難處理, 常常要用木頭試個多次...
現在有 fusion360跟3D printer, 就容易許多....


者兩片是用ABS, 大約4mm厚....前面的隔板塞了一顆 bearing...


馬達是用剛好有的:
Turnigy D3548/6 790KV Brushless Outrunner Motor
Spec.
Battery: 3~5 Cell /11.1~18.5V
RPM: 790kv
Max current: 40A
No load current: 1.8A
Max power: 715W
Internal resistance: 0.040 ohm
Weight: 159g (including connectors)
Diameter of shaft: 5mm
Dimensions: 35x48m
Prop size: 11.1V/12x12 18.5V/11x7
Max thrust: 1650g


預計大約300-600W 應該就可以了, 可能先從3S開始, 如果不行再改成4S...


這檯的水平尾翼是全動式的, 不過飄飄機的servo應該不會需要太大力,
這兩棵是遙控車拆下的Traxxas servo, 約有6kgcm的能力應該可以...


電變是 mega power 50A...也是庫存...

原本說明書是要把一顆中型的 servo 塞在尾部, 我做了個機構, 轉接帶動水平尾翼的部分, 側邊的機體先用3D printer的下腳料補強, 轉角的部分是用 servo horn 加上軸承,用3mm的螺絲固定...
球投是用直升機的料.... 藍色膠帶是用來標示上接連感的垂直位置


方向舵的部分用原附的鋼絲, 因為出線的口有點外面, 需要折彎一下....

就不適用 carbon rod了.....
 

2022/5/6

3DR Iris with Parrot Sequoia

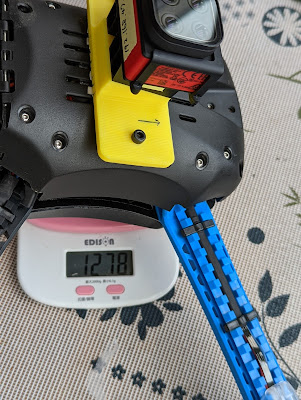
 The sequoia is unmounted from parrot DISCO, so it comes with a different mount.


using 3D printer to make fixture to fix sequoia under quad, and mount the light sensor on top of quad. But you need to put the sensor on the stern side, in the front there is a GPS inside.


Also need to make extension cable for the connection between light sensor and sequoia.   There are 2 short micro USB (both side)cables, one is form connection to light sensor, the other one serve to supply power to sequoia. I tried to supply 5V through the connection cable between sequoia and sensor, it did not work. So I use a DC-DC to take power from battery and feed 5V into the micro USB cable on Sequoia.


Setting of the seqoia is done through wifi, sequoia will start as a AP, there is a config page on 192.168.47.1
sequoia has own GPS, so you can set a distance between pictures. a calculation assistance is also provided in the config page.

The first test seems fine, although there are ripples on the RGB photos, not the others.


The flight is done at 25m attitude.


The first take in the rice field, I was using the same setting, but seems the rice field has less characteristic , the SW end up with warning. 

I checked photos, every one does contain gps info.
The second try we made to height to 50m, wish to make more terrain structure in each photos.
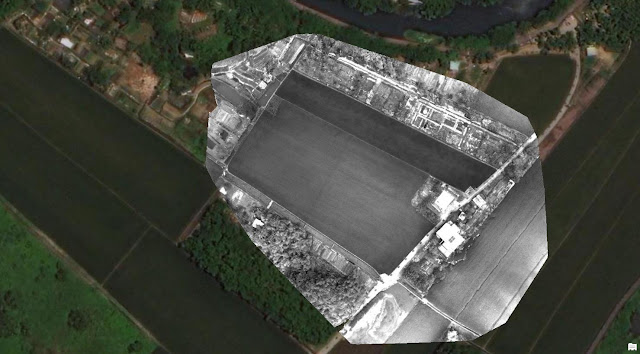
This time, we have the result:
With certain wave length, we do see the gas emission difference on 2 different field.

The flight takes about 4 mins, distance of grid is about 0.6km, used 1220mah


With the old battery at 5100mah, the current runs at 18-20A. Old battery drop voltage very quickly, planned to use new battery with lower mah to reduce weight.


2020/9/12

mateksys.com f411-wing

 http://www.mateksys.com/?portfolio=f411-wing


connection chart and S.BUS seting on UART1, GPS on UART2, smart port on softserial 1


the receiver and gps power can't be powered from USB, you need to add battery connection on the power pad.

I used jumper R1 receiver and nema 38400 gps..

then I got telemetry data on my T18, and need to use inav lua telemetry:

https://github.com/iNavFlight/LuaTelemetry

copy the necessary files on to jumper T18, and setup the telemetry page with inav widgets..

data works in charm...


2020/9/3

Volantex FPV Raptor 2M with Pix mini 001 20200904


Back up testing plane of Eugene.
with 3DR pixmini, stock power module, 3dr air speed sensor.
ESC at 40A
CG = 68mm from wing edge.

air speed sensor setup:
current sensor set up(measure at 15A)

Slight increase P gains as first test


2018/12/21

中庄調整池景觀土丘 飛場


Google map查 "中庄調整池景觀土丘 "....
在鶯歌跟大溪中間.....
導航會帶從鶯歌火車站經過,到圖中黃色1的地方,就看得到高高的土堤
其實也可以從八德走,從圖中黃色2的地方下去...應該比較不會塞車....
土堤很高很大一片, 跑道大約東北向.....
因為峽谷及地形的關係會有上升氣流的感覺.....
很平,比福德坑還平....


 東北向
 空域很好...
滑翔機必飛!!
 西南向
 幾乎不必用動力
大漢溪上有時有空勤直升機會機過, 不多....要小心....

2017/4/29

20170429 Parrot Bebop 2 首次飛行

20170429 華中橋河濱公園,Henry, Rick and Eugene

Bebop 2 首飛,測試:
1. 基本操作
2. 使用 iPad 操作
3. 航點飛行
4. Follow Me 功能


2016/11/28

20161119 無人機操作之工程訓練

從2015.10起,已完成5梯次,每梯次36人,共175人次,運用無人機操作的工程訓練!

圖一,教練檢視學員飛行前的準備。

圖二,學員按照操作程序,熟悉遙控器的操作。

圖三,檢查飛行姿態。

圖四,地面任務控制,飛手,與飛行器起飛的時刻...